Device management
Radon IDE manages its own instances of Android emulators and iOS simulators separately from the ones you normally create with Xcode or Android Studio. Thanks to this architecture, you can easily add, update and remove devices you no longer need directly from the Radon IDE panel.
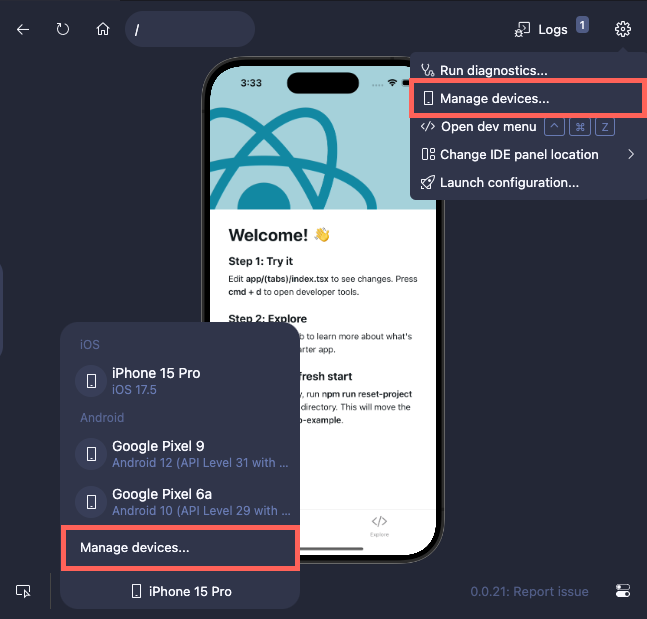
You can open the manage devices modal in two ways. From the settings in the top-right corner Settings > Manage devices... or from the devices dropdown in the bottom-left corner of the panel.
Managing devices
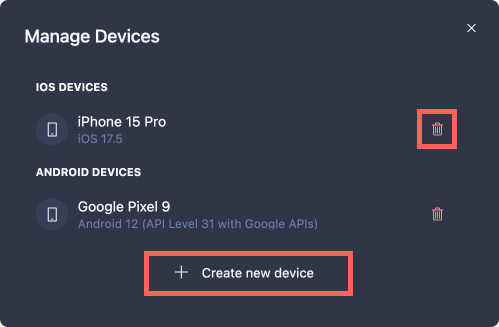
The manage devices modal lists all your current devices. You can add new devices with a + Create new device button, start and stop devices, edit the device name, and remove them.
Here, you can also decide whether you want the IDE to turn off devices when switching between them, or keep them running in the background.
The running devices are highlighted as + X on the device dropdown on the bottom of the Radon IDE panel. You can stop the running devices in background from the dropdown.
Creating a device
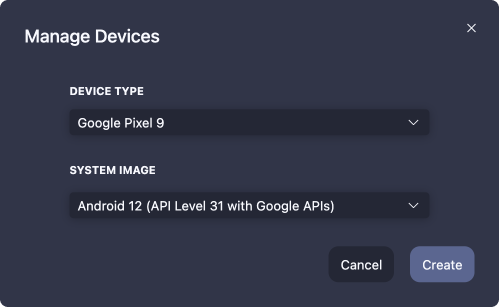
Before creating the device you need to pick the device type and system image.
The device type affects the device frame shown in the Radon IDE preview. Currently, a limited range of device types is supported.
The system image is the Android system image or iOS runtime running on the created device. In order for system images to appear in the Radon IDE, they first must be installed in Xcode or Android Studio, respectively. For more information, see guide to Simulator System Images.
The device name is a familiar name which is later used as a label in the interface.
Removing a device
Clicking the delete icon in the manage devices modal will ask if you really want to delete this device. A deleted device cannot be restored. If you want to have the same device you deleted, you have to create it again.
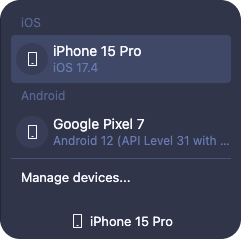
Switching current device
You can switch the device currently in use with the manage devices dropdown in the bottom-left corner of the Radon IDE panel.